Getting Started
This guide assumes that you have successfully installed the Subsonic server on your computer. If not, please refer to the installation instructions.
After installing and starting Subsonic, open the Subsonic web page. The web address may differ depending on your installation options, but is typically http://localhost:4040.
Setting up user accounts
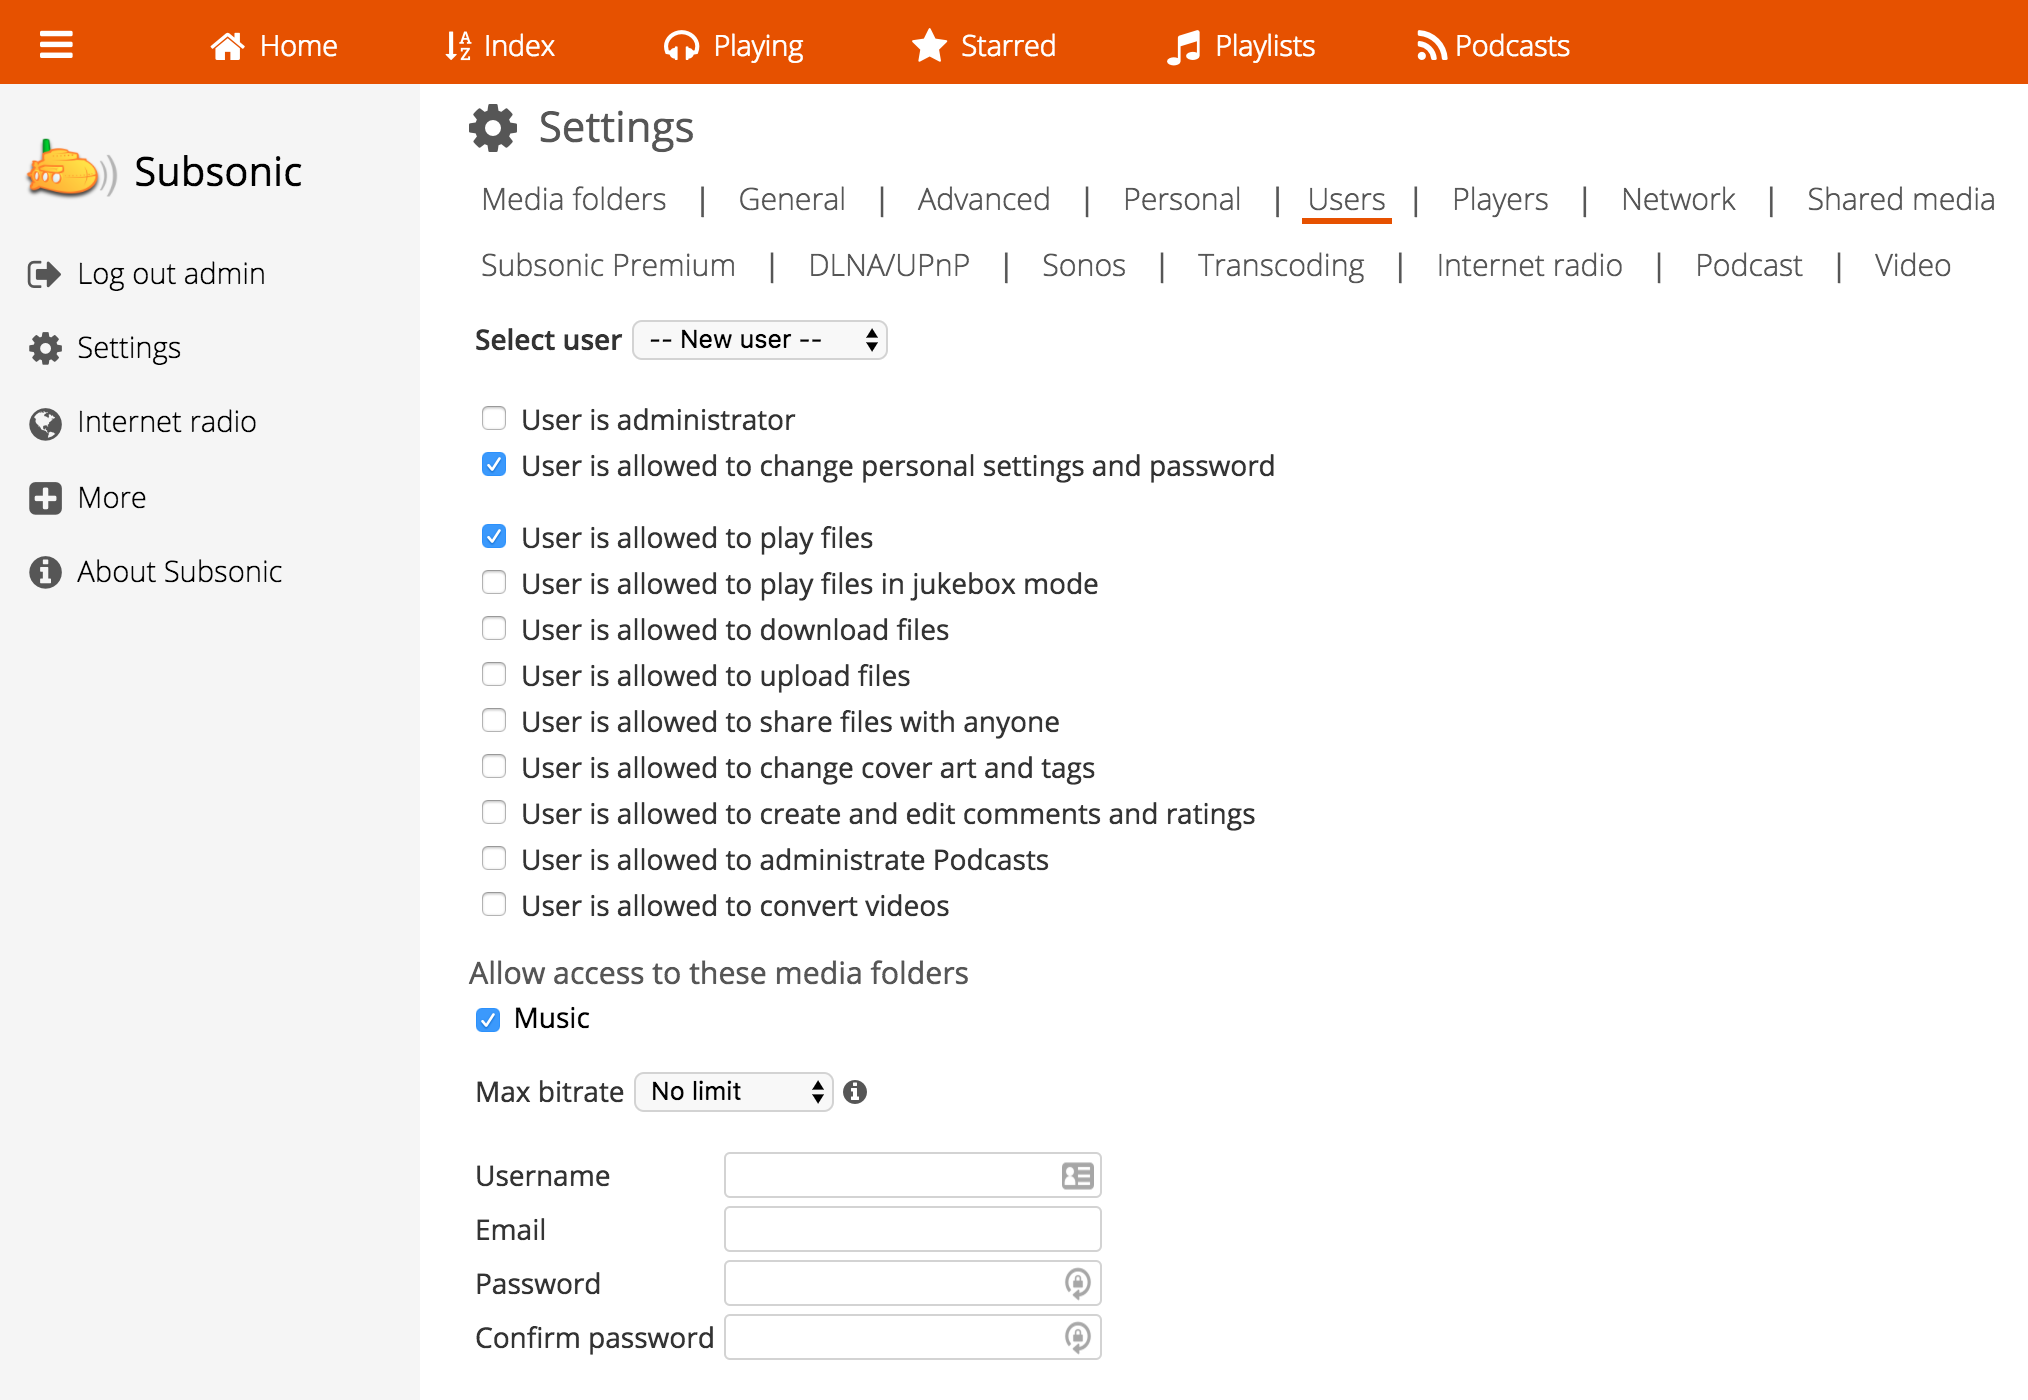
The default username and password for Subsonic is admin. You should absolutely change this to secure your server. Go to Settings > Users to change this password.
In the same page you can also create new user accounts and specify which operations they are allowed to perform.
Setting up media folders
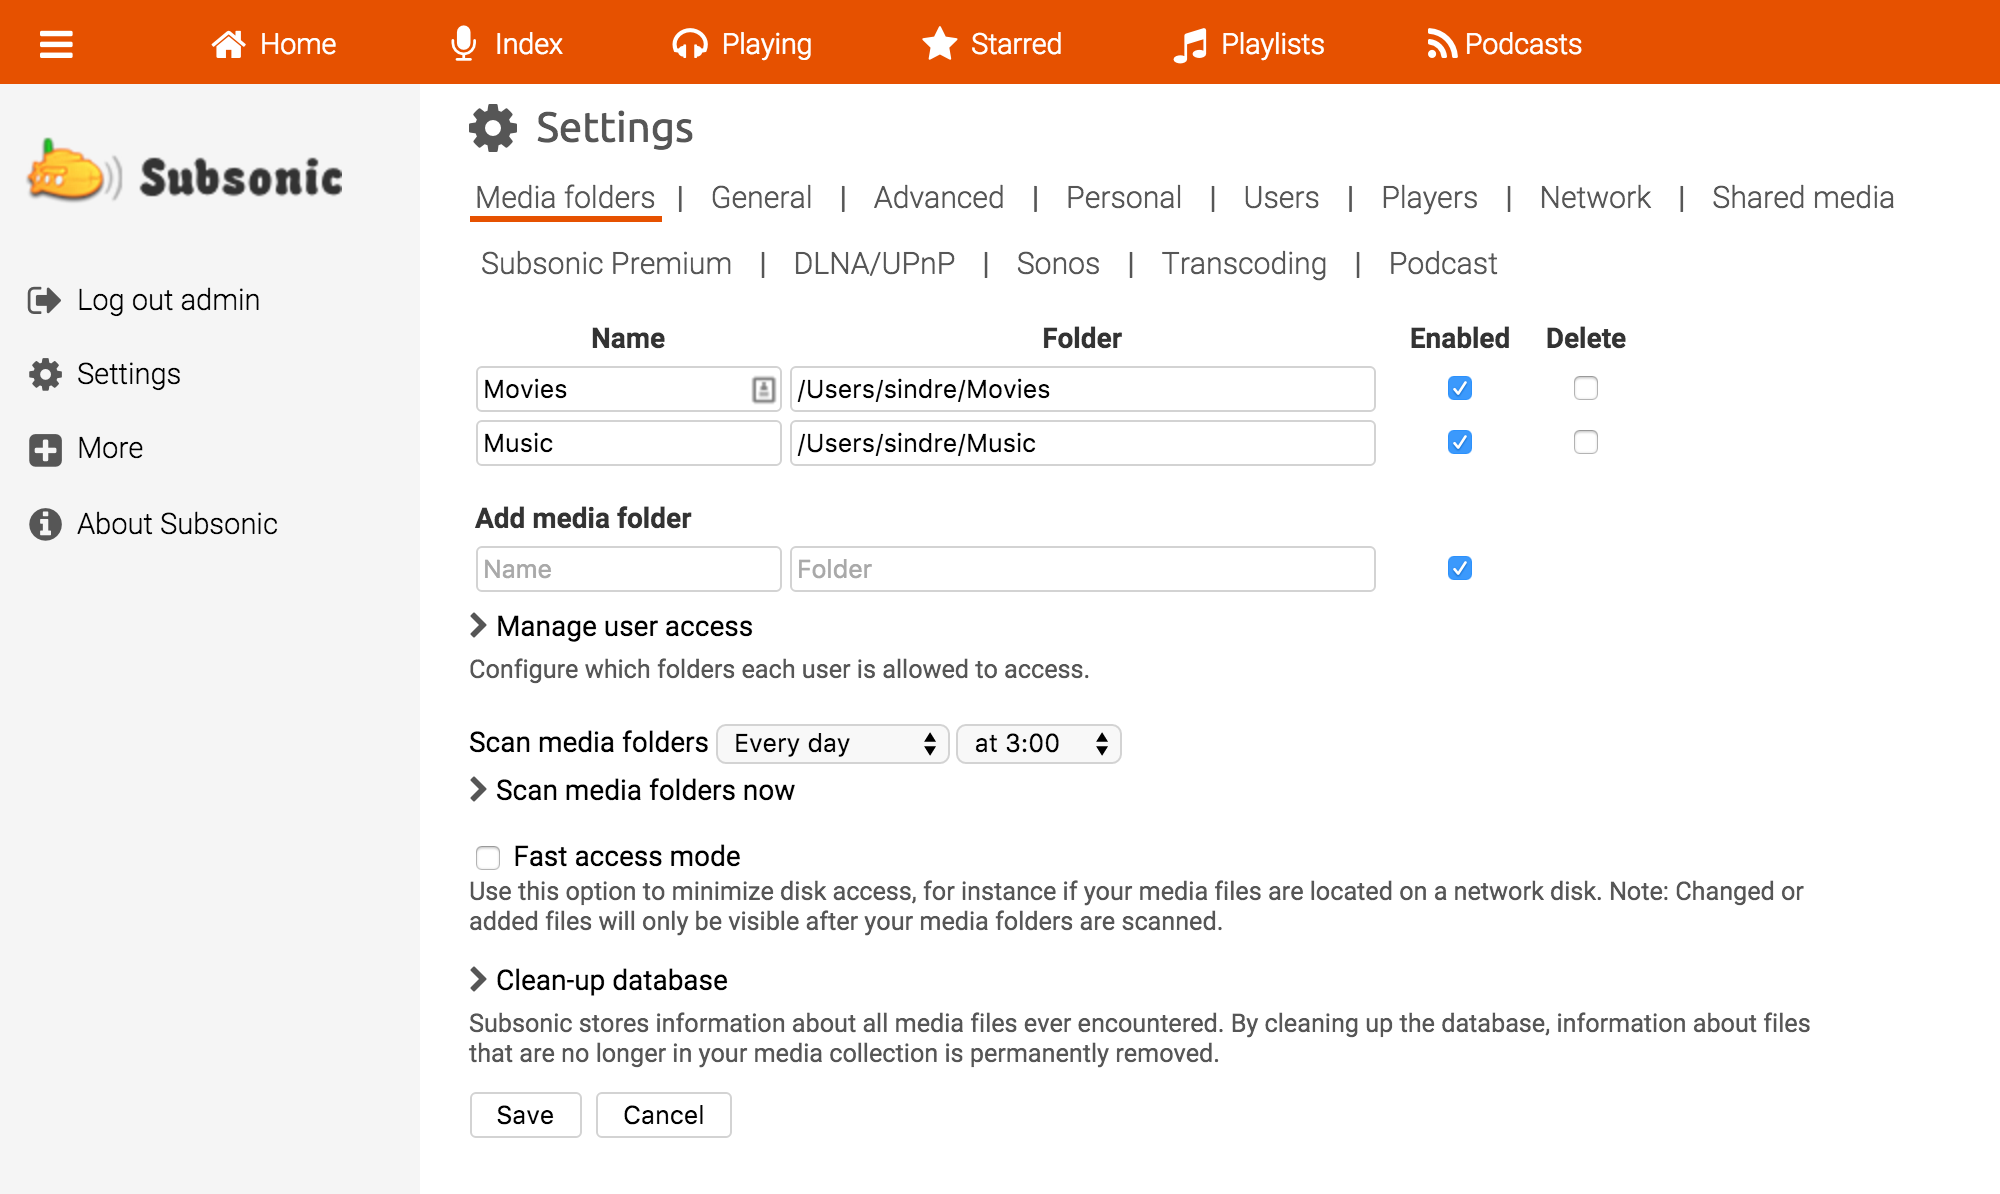 You must tell Subsonic where you keep your music and videos. Select Settings > Media folders to add folders. (If you don't see this
option you must first log on to Subsonic with a user that has administrative privileges, for instance the admin user).
You must tell Subsonic where you keep your music and videos. Select Settings > Media folders to add folders. (If you don't see this
option you must first log on to Subsonic with a user that has administrative privileges, for instance the admin user).
Also note that Subsonic will organize your music according to how they are organized on your disk. Unlike many other music applications, Subsonic does not organize the music according to the tag information embedded in the files. (It does, however, also read the tags for presentation and search purposes.)
Consequently, it's recommended that the music folders you add to Subsonic are organized in an "artist/album/song" manner. There are music managers, like bliss and MediaMonkey, that can help you achieve this.
Using network disks in Windows
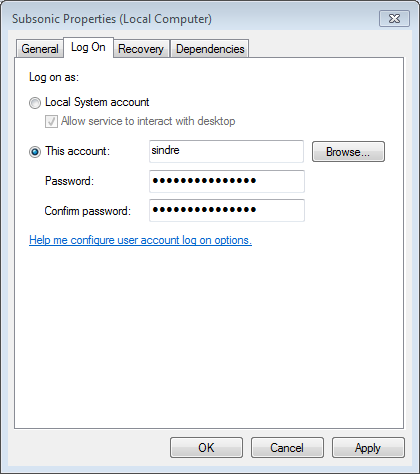
Subsonic runs as a service on Windows. By default, mapped networks disks are not visible to services. To fix this you can change the Subsonic service to run as the logged-on user instead of the System user.
- Open Services in Windows.
- Right-click the Subsonic service and select Properties.
- Click the Log On tab.
- Activate This account and enter your Windows username and password.
- Click OK and restart the service.
Setting up remote access
With Subsonic you can access your music anywhere on the internet or from your iPhone or Android phone. However, in order to do that certain conditions must be met:
- Your router must have a public IP address and must be accessible from the internet. This is true for most home internet connections.
- Your router must support the UPnP or NAT-PMP protocol so that Subsonic can setup the appropriate port forwarding. If your router doesn't support this you will have to configure the port forwarding manually.
Automatic port forwarding
To enable automatic port forwarding in Subsonic, go to Settings > Network and enable the "Automatically configure your router..." option. Click the Save button and pay close attention to the status message that is displayed. If you get an error message, you should first try to configure your router to enable UPnP (or NAT-PMP if you have an AirPort from Apple). If it still fails, or your router doesn't support UPnP, follow the instructions below. If it works, the Subsonic server will at regular intervals (every hour) contact the router and tell it to forward incoming connections (from the internet) to the Subsonic server.
Manual port forwarding
If the automatic option didn't work you can still set it up manually. Consult portforward.com to get instructions specific to your router. Note that the instructions contain important steps on how to configure a static IP address for your computer. You should follow these. Later in the process, you will find that Subsonic is not on the list of applications, so select the "Default Guide" instead.
When you get to the point where the router asks for private and public ports, enter the port number the Subsonic server is using (normally port 4040) for both values. If asked for a protocol, select TCP.
If you are unsure what any of this means you will probably need to consult someone with network configuration experience.
Setting up your personal subsonic.org address
Once you get the port forwarding set up correctly, the next step is to get yourself an easy-to-remember web address. You will use this address to access your Subsonic server from the internet.
From Settings > Network you can register your address. (Remember to log on with admin rights). Enable the "Access your server over the internet..." option, and enter your preferred address, for instance http://joe.subsonic.org.
Click the Save button, and pay attention to the status message that is displayed. Note that Subsonic will also perform a test to ensure that the web address works properly. If the test fails it might be an indication that the port forwarding is not set up correctly.
If you don't want to use a subsonic.org address you can get similar services from dynamic DNS providers such as dyndns.com.
Troubleshooting
This section describes some common network problems and how to fix them.
- Multiple routers. There might be more than one router on your network, for instance both an "inner" wireless router and an "outer" (closest to the internet) cable/fiber modem with routing enabled. You must make sure that incoming traffic received by the outermost router is forwarded to the inner router (which in turn forwards the traffic on to your Subsonic server). You can do this by configuring port forwarding on the outer router (forward traffic to the inner router), or setting it in bridge mode. Your ISP should be able to help you if you have problems with this.
- Port blocked by ISP. Many ISPs (Internet Service Providers) block incoming traffic on certain ports. Subsonic uses port 4040 by default, which is normally not blocked. It could still be worth trying to run Subsonic on a different port. Open the Subsonic Control Panel by clicking on the Subsonic tray icon. Change the port number to any random number between 1025 and 65,000. If you set up manual port forwarding (see above), remember to update that as well.
- Firewall. You might be running firewall software (on the Subsonic server) which blocks incoming traffic. If this is the case, try first to turn the firewall off. If this helps, turn the firewall back on and configure it to allow incoming traffic to Subsonic. Note: The Windows installer version of Subsonic will automatically configure the built-in Windows Firewall.
Registering your license key
 Most features in Subsonic are free, but some (like mobile phone streaming) require that you upgrade to
Subsonic Premium after the 30-day free trial. After you receive the license key
by email, you must register it on your server as follows:
Most features in Subsonic are free, but some (like mobile phone streaming) require that you upgrade to
Subsonic Premium after the 30-day free trial. After you receive the license key
by email, you must register it on your server as follows:
- Click the "Get Subsonic Premium" link in the top right corner of the Subsonic web interface.
- Enter the email address and license key you received by email.
Using https
For improved security you can turn on https encryption. On Windows, open the Subsonic Control Panel by clicking on the Subsonic tray icon, then enable https on the specified port (default 443).
On Linux, add --https-port=4443 (or any other port) to SUBSONIC_ARGS in /etc/default/subsonic (Ubuntu/Debian) or /etc/sysconfig/subsonic (Fedora/RPM).
On Mac, look for -Dsubsonic.httpsPort=0 in /Applications/Subsonic.app/Contents/Info.plist and change it to the desired port number.
Note that Subsonic uses a self-signed https certificate by default. This provides encryption but not proper authentication. To use your own certificate you must put it in a Java keystore, then specify the following Java system properties: subsonic.ssl.keystore (path to an alternate SSL keystore), and subsonic.ssl.password (password of the alternate SSL keystore). On Windows, you can set these system properties in C:\Program Files (x86)\Subsonic\subsonic-service.exe.vmoptions. On Mac, you can add them to /Applications/Subsonic.app/Contents/Info.plist.